Preparing for Departure

The first week of March was pretty hectic mostly because of the “why do today what you can do tomorrow” mentality that we both seem to have. As it so happens a lot of things were left to the last-minute, or in our case the last week.  We both worked almost every day on small things on the Defender to prepare us for departure.

Read more

Time to re-trim the Defender Seats

The seats in our Land Rover Defender are finished, I mean really finished, finished enough that every time we sit in the seats a puff of foam dust comes out of the cracks around the metal base, looking much like a bad case of dandruff, and on the new black carpeting to boot!

After almost 20 years the foam is disintegrating and cracked and there isn’t much support left in the either the seat base or the backrest foams.  The two options were either to buy completely new seats which run about €1,000 each or to invest the time to re-trim the Defender seats myself.

After doing a bit of research we found two companies offering re-trim kits Brit Part and Exmoor. After reading a number of reviews we decided to go with Exmoor Trims two seat Defender re-trim kit, which after shipping is about 10% the cost of new seats.

We were impressed with the quality of the fabric and the workmanship, though the instructions could have been a bit more detailed we did manage to figure the fiddly bits.  Brit Part packs an Instructional DVD in their kit unlike Exmoor, but there are a number of videos showing how to do it on both companies websites.

After we removed the old fabric I was a bit shocked to see how bad of a shape the foam was in, the photos don’t really do justice to how crappy the old fabric was and how good the new fabric is, you will just have to take our word for it. The condition of the seat foam made me a bit nauseous to be honest and even more happy that we decided to buy the retrim kit.

It took about 3 hours to do the first seat, and about 2 hours to do the second seat as I had a bit of help with the seat base.  We are quite pleased with how it turned out, and even managed to re-install the seats today as well.  What a difference it is to have the Defenders seats re-trimed!  The seats are now actually comfortable!

The Last 20 Percent

keep-calm-its-almost-finishedI’m getting pretty tired of saying “almost finished”, but it is really almost finished.  One could almost go so far as to say that we are currently experiencing the “old” 80/20 rule. 80% of the work on our Land Rover was completed relatively quickly and now the last 20% seems to take for ever! But thats no all, we don’t only have to complete work on the Land Rover we also have to start (rather late mind you) trimming our house hold down so that we have only a very small amount of stuff to put into storage. There are things in the basement that we so seldom use it doesn’t make much sense to go and hold onto them like pack rats.

Read more

Zarges Boxes K470 Series

Storage is King

As the saying goes “the more you know, the less you need” however, for most of us the more comfort you want, the more “stuff” you inevitably end up wanting to take with you. Making the most of the available space becomes a top priority, though one that must be balanced with comfort.  For us our mantra has become “Storage is King”.

We could have turned the rear of the Land Rover into one big storage area but we would then lose the ability to use it a sleeping area when the weather turns too cold to sleep in the roof tent. Besides, if we did that we would probably lose the camper status of our Land Rover.

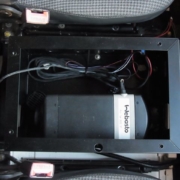
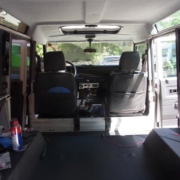
The trade off was that we would create a cupboard that would take up the left side of the Land Rover for the length and width of the wheel well.  We divided the area into 9 storage areas of equal width giving each 3 units of storage, plus 3 for general storage.  Under the “couch” is a 123 cm x 44 cm x 25 cm storage space, and behind the passenger seat a 60 cm x 95 cm x 38 cm storage area plus a small 25 cm x 90 cm divided into 2 storage areas one of which can be accessed when the mattress is lifted, the others via the rear passenger side door. Additionally we have, behind the drivers seat, our kitchen storage area which measures 45 cmx 65 cm x xx cm and is accessible from the passenger door behind the drivers seat.

The jury is still out on how well we will eventually use the space that is available to us.  We do, however, have additional storage possibilities, but they come with their own challenges.


Storage Boxes

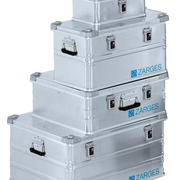
Zarges boxes they are pretty much the best storage boxes out there, rugged, durable, dust and water proof (up to IP 65) and come in a number of sizes that would fit perfectly on our roof rack.  The only issue is which to buy and how to mount them on the roof.  The “which to buy” question will be answered shortly and depends on the area and additional weight that we have available on the roof rack.

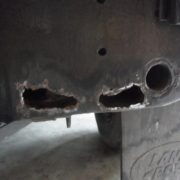
The “how to mount them” question is one that has been distracting me for some time.  Apparently there just isn’t a way to securely fasten the boxes to the roof rack that also makes it difficult to simply climb up on the roof undo the strap and walk away with our box and its contents. Perhaps I’m being a bit paranoid but we want to be sure that we can leave the Defender alone for a few hours to hike or bike without worrying that someone is going to walk away with our stuff. I have been googling and seaching forums here in Germany, as well as adventure forums in the UK and the USA for the answers but just haven’t found any.  I guess the only thing left for me to do is design something and have it custom made to suit our needs, patent it and then make a fortune selling it.

However much we chant “Storage is King” the amount of storage space is limited by the simple nature of the size of our Land Rover and the number of boxes we can pack onto the roof.  We will have to be very choosing in prioritizing what we take with us and what stays behind.

Webasto Air Heater

Lets not kid ourselves in some parts of the world winter comes early and stays long. While our Howling Moon roof tent is well built; sleeping in single digit temperatures for long periods can be wearing. The desire for warmth and coziness could push us to blowing our rather tight budget on hotels and motels. The solution is to install a Webasto air heater so we can retreat to the warmth of our Defender when the cold starts to wear us down.

Read more

Addons Galore

Our landrover got some much needed addons, ok they have been planned for some time it had just taken some time for our roof rack from Qualan to arrive, now that it was here we could add our Howling Moon and Foxwing after which we would be ready to test them out during our August vacation.

Read more

New Tires and a Check-up

It was that time again the TÜV (Department of Vehichles) saftey inspection is due at the end of July, so I wanted to make sure at least the base floor in the landrover was finished. I also wanted to fix a couple rust bubbles that were forming on the rear cross member before bringing it to our Mechanic.  The best way to pop rust bubbles on steel is with a hammer, the rust falls off relatively fast and then you can sand it down, prime it and repaint it relatively easy. The only problem was the bubbles weren’t simply surface rust as I expected them to be, but the rather shoddy body filler patches from the previous owner.  As soon as my hammer connected with the body filler patches, well as you see from the picture, the holes in the cross member made themselves known.

Such a patch job on a Defender cross member isn’t exactly uncommon, since its the most common spot where spray water, dirt and grime collect, which results in rust through from inside to the outside. It is also exactly where the main frame ends join the cross member this often means that the frame starts to rot at that spot and eat its way inwards.  Luckily the frame is still solid (so my mechanic says) and the holes can easily be welded without issue, which is exactly what we did.  Of course I wasn’t sure that the cross member was going to be in good enough condition to repair again so I went out and bought a replacement cross member to be on the safe side prior to taking it for service.  I didn’t want to run the risk that after inspecting the condition of the cross member that we would have to wait 3-4 days for a cross member to be delivered.  Thankfully it didn’t have to be installed that saved us quite a bit of work as replacing would take up to 3 days labor!

Four new tires, a complete service and a general check-up later and our Mechanic was praising our Landrover. According to him our Defender was a huge bargain for the price we paid.  Thats a huge weight off our shoulders considering what we are planning a good feeling about the vehicle from our Mechanic is peace of mind.

interior insulation and headline

Insulation and Headlining Complete

Although we hadn’t planned on working the entire weekend on the Land Rover it ended up being one of our most visibly productive weekends in a long time.  We have spent months tinkering on the car most of the work thus far has been disassembly work, but this weekend saw our first major steps forward. Both the insulation as well as the Headlining are complete.

Read more

Double Battery System

It took almost four days but I have finally managed to get the double battery system that I bought from Trip-Tec installed.  A double battery system is rather important if you are going to be running accessories like a fridge/cooler or heater or even if you want to listen to the stereo for long periods of time.  If you do all those things on your main battery you will end up with a empty starter battery and will be stuck where you are.

Read more